Apple has already fixed the baseband problem. This article is outdated. The contents below are unreliable.
proceed to outdated articleAuthor: xmwpumpkin
-
Deconstructing the DarkSword Exploit Chain
This post is for educational and research purposes only. Do not attempt to reproduce or run this exploit on any production, personal, or unauthorized systems. Doing so may violate laws and expose you to legal risks. The vulnerabilities are patched. Always keep your Apple devices updated.
For years, iOS security has heavily relied on a strict foundational layout: strong application sandboxing. The structural principle dictates that even if an attacker manages to compromise a single frontend surface, they remain confined within a tightly restricted environment, unable to touch the broader filesystem or access core system kernels.
In March 2026, that assumption shattered.
Discovered by Google’s Threat Intelligence Group alongside enterprise mobile security firms, DarkSword represents a terrifying evolution in zero-day mobile spyware. It is an intricate example of a “one-click” remote attack chain that completely collapses traditional lines of defence.
Tons of iPhones are in a very dangerous state. Hackers doesn’t care about your privacy, they can directly read your notes, photo album, etc, and steal your credentials such as your crypto menonic, credit card credentials, account passwords, and withdraw all money by using these information they steal.
The Story
In early March 2026, a series of targeted compromises were detected involving high-profile web portals. Threat actors had weaponized these trusted sites to deliver a completely invisible, browser-based payload.
Unlike legacy spyware frameworks that required complex social engineering or convincing a victim to manually install a malicious configuration profile, DarkSword achieved remote code execution via Safari.
Apple responded by pushing rapid security updates to dismantle the exploit chain across iOS 18.
How it works
Detailed step-by-step flow of the infection chain:
I am not providing any of the malware, just explaining the way they work.
- The Entryway
- The attack begins when a vulnerable device loads a compromised webpage containing a background loader script.
- The script targets a memory corruption bug inside Safari’s JavaScriptCore engine. This grants the attacker initial arbitrary read/write capabilities, but execution is still entirely trapped inside the isolated WebContent process.
- Defeating Hardware Protections
- Modern iPhones protect against control-flow hijacking using hardware-level Pointer Authentication Codes. It cryptographically signs pointers to prevent attackers from redirecting function calls.
- DarkSword clears this hardware barrier by exploiting a logical flaw in how specific kernel tasks manage internal memory structures. By generating a valid signature mismatch, it neutralizes PAC protections entirely.
- The Double-Sandbox Escape
- Trapped in the browser, the malware executes a rare sequential breakout:
- WebContent Escape: The payload breaks past basic browser sandboxing boundaries to interact with system-level background processes.
- GPU Sandbox Escape: By targeting vulnerabilities within the iOS graphics rendering daemon, the exploit gains intermediate privileges, allowing it to interface directly with core operating system drivers.
- Trapped in the browser, the malware executes a rare sequential breakout:
- Privileged Escalation and Execution
- Utilizing a local privilege escalation (LPE) vulnerability, the payload elevates its status directly to root access. It intercepts the memory space of highly protected system tasks, effectively granting the attacker total control over the device.
- The Hit-and-Run Evacuation
- Instead of attempting to establish permanent persistence (which leaves a lasting file footprint on the physical NVMe storage), DarkSword runs entirely in volatile memory.
- It immediately compresses and encrypts target keychain files, message databases, and session tokens, exfiltrating them via standard HTTPS traffic disguised as background app data.
- Once exfiltration completes, it triggers an internal self-deletion routine, clearing its active memory footprint. Following a simple device reboot, almost no forensic traces remain.
Actions that you must take immediately
- Update iOS now. Ensure your Apple devices are running the latest security response patch level to ensure browser engine flaws are fully closed.
- Utilize Lockdown Mode if you are traveling or operating in high-risk networking environments, which severely restricts unnecessary web rendering elements.
- Isolate browsing activities from highly sensitive financial or operational environments when dealing with unknown or unverified external links.
The end of perimeter-only security has arrived. Keep your devices updated.
If you’re unable to upgrade your OS, remember not clicking any link or scan any QR code that you’re not familiar with.
Official Disclosure: Google Cloud Blog: The Proliferation of DarkSword: iOS Exploit Chain Adopted by Multiple Threat Actors
- The Entryway
-
How a Windows Defender Zero-Day Let Attackers Escalate to SYSTEM
This post is for educational and research purposes only. Do not attempt to reproduce or run this exploit on any production, personal, or unauthorized systems. Doing so may violate laws and expose you to legal risks. The vulnerability is patched. always keep your Defender and Windows updated. I strongly recommend running experiments only in isolated virtual machines with proper snapshots. Stay ethical and responsible.
BlueHammer (CVE-2026-33825) is a beautiful and scary example of how legitimate Windows features can be chained together for Local Privilege Escalation from a standard user all the way to NT AUTHORITY\SYSTEM.
The Story
On April 3, 2026, a researcher known as Chaotic Eclipse publicly released a working PoC after growing frustrated with Microsoft’s coordinated disclosure process. No CVE at first and no patch. It is a true zero-day with full exploit code.
Microsoft eventually assigned CVE-2026-33825 and fixed it in the April 2026 Patch Tuesday via a Defender Antimalware Platform update for version 4.18.26050.3011 or newer.
The exploit was quickly used in the wild, and the community even improved the original PoC.
How it works
This isn’t a memory corruption or kernel exploit. It’s a TOCTOU race condition combined with clever abuse of trusted Windows components such as
- VSS
- oplocks
- cloud files API
- NTFS Junctions
- Defender remediation pipeline
Detailed step-by-step flow based on public analyses of the PoC
- The exploit queries the Windows Update Agent COM interfaces to check for a pending Microsoft Defender Antivirus definition update. This is a prerequisite cuz the vulnerable remediation workflow only triggers reliably during signature updates
- Trigger Defender Remediation and VSS Snapshot
- Drop a detectable test file (EICAR-like string in
foo.exeor similar) in a temporary directory to force real time protection scanning
Place a batch oplock onRstrtMgr.dllwhich is a DLL Defender accesses during remediation - When Defender touches the file, the oplock breaks, signaling activity
- A background thread polls
\\DeviceviaNtQueryDirectoryObjectto detect the newHarddiskVolumeShadowCopy*device created by VSS
- Drop a detectable test file (EICAR-like string in
- Register Cloud Files Sync Root
- Register the current directory as a Cloud Files sync root using
CfRegisterSyncRootandCfConnectSyncRoot - Drop a placeholder .lock file. When Defender enumerates the directory and accesses it, the
CF_CALLBACK_TYPE_FETCH_PLACEHOLDERScallback fires. - The callback checks the caller PID to confirm it’s the
WinDefend / MsMpEng.exe(SYSTEM) process. - Immediately acquire a second batch oplock on the .lock file and hold it. Defender blocks on
GetOverlappedResult, stalling the process while the VSS snapshot remains mounted.
- Register the current directory as a Cloud Files sync root using
- Path Redirection
- With Defender paused, manipulate the filesystem
- Set an oplock on a key update file like
mpasbase.vdmin the temporary update directory. - When triggered, rename/move the update directory.
- Recreate the directory as an NTFS junction pointing to a controlled location
- Create an Object Manager symbolic link inside it pointing to the VSS snapshot path of the protected registry hive
- Set an oplock on a key update file like
- this creates TOCTOU.
- With Defender paused, manipulate the filesystem
- Privileged Read
- Defender resumes its operation and running as SYSTEM, reads the SAM database from the VSS snapshot. The exploit receives the contents
- Credential Extraction
- Reconstruct the boot key from the SYSTEM hive.
- Decrypt LSA secrets and extract NTLM hashes from the SAM hive.
- Use
SamiChangePasswordUserto change the local Administrator password temporarily. - Log on with the new credentials, duplicate the token, elevate integrity to
SYSTEM. - Create a temporary Windows service to spawn a cmd.exe running as
NT AUTHORITY\SYSTEM. - Restore the original password to clean up traces.
The entire chain relies on precise timing and native Windows features.
Actions that you must take immediately
- Update Microsoft Defender Antimalware Platform to version 4.18.26050.3011 or higher.
- Enable ASR rules. official Microsoft ASR documentation
- Use standard user accounts for daily work and isolate test machines.
Update your system NOW if you haven’t.
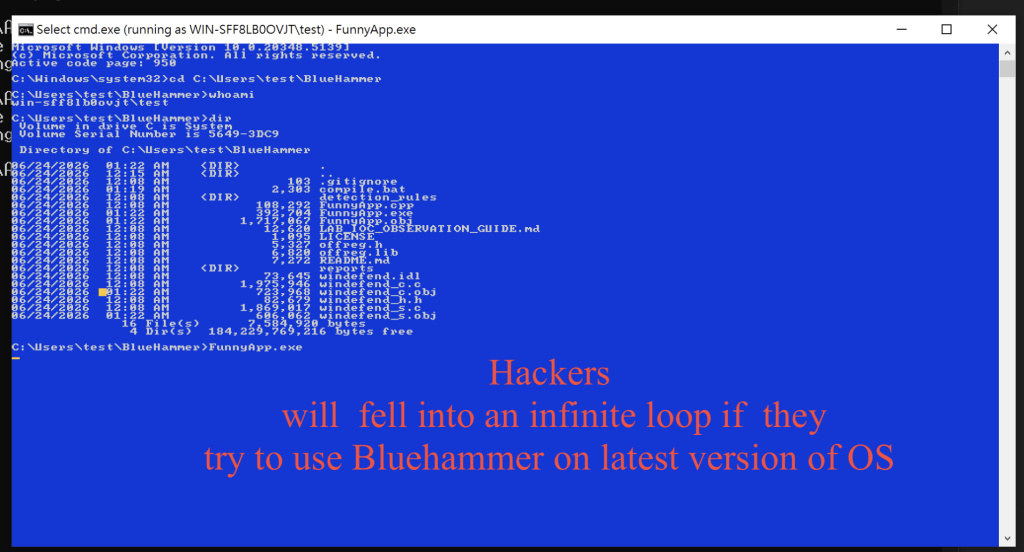
If you attempt to run the publicly available proof-of-concept code on a fully updated system , the exploit will fail to achieve privilege escalation.
As shown below, instead of spawning an escalated shell, the payload will simply hang in an infinite loop because the underlying race condition has been neutralized:

Further Research
Cyderes: BlueHammer Vulnerability Deep-Dive
Vectra AI: When the Defender Becomes the Door
MSRC: CVE-2026-33825 Security AdvisoryThe End
www.pcl2.top -
Worst shopping experience at the Apple Store
I have been a loyal Apple user for years and always choose their products first. However, my recent attempt to buy a new iPhone 17 Pro turned into an absolute nightmare.
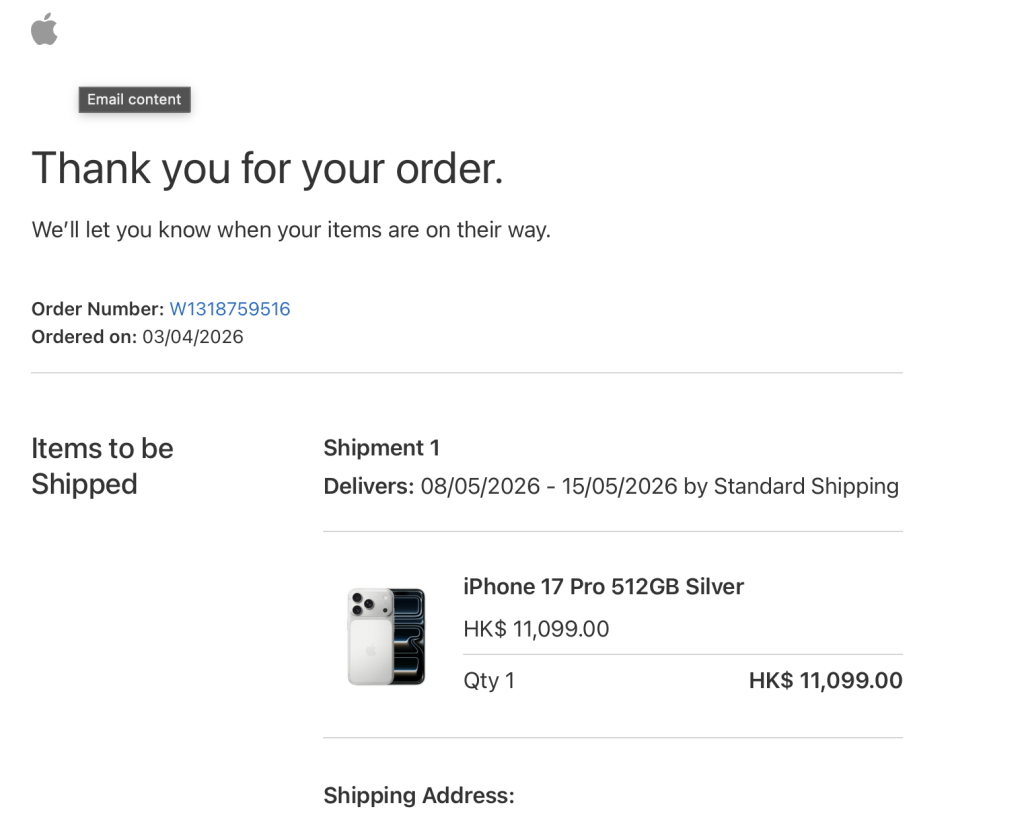
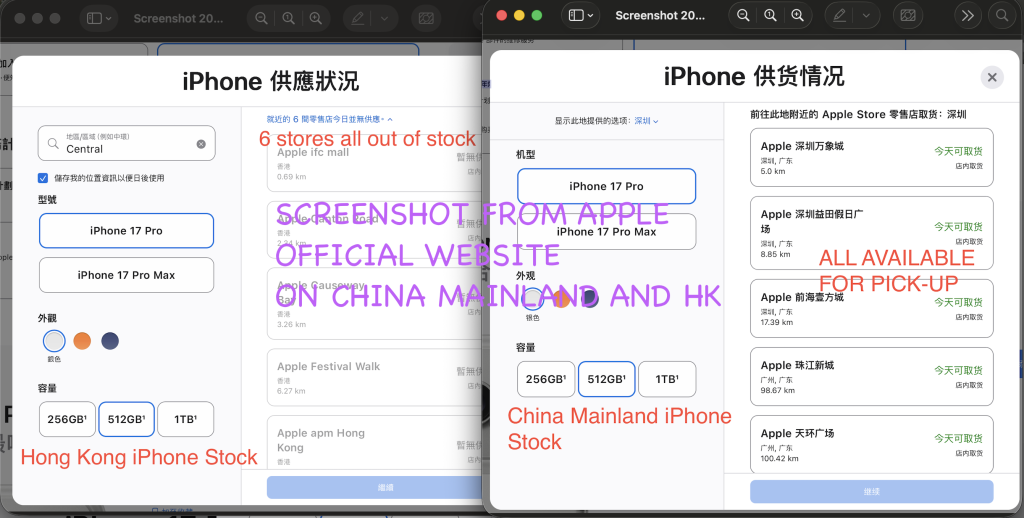
My phone broke unexpectedly after it fell into the bathtub. With the repair quote reaching $5000 HKD, I decided it made more sense to buy a new device instead. Since all six Apple Stores in Hong Kong had no stock for pickup, I placed a delivery order on the official Apple website.

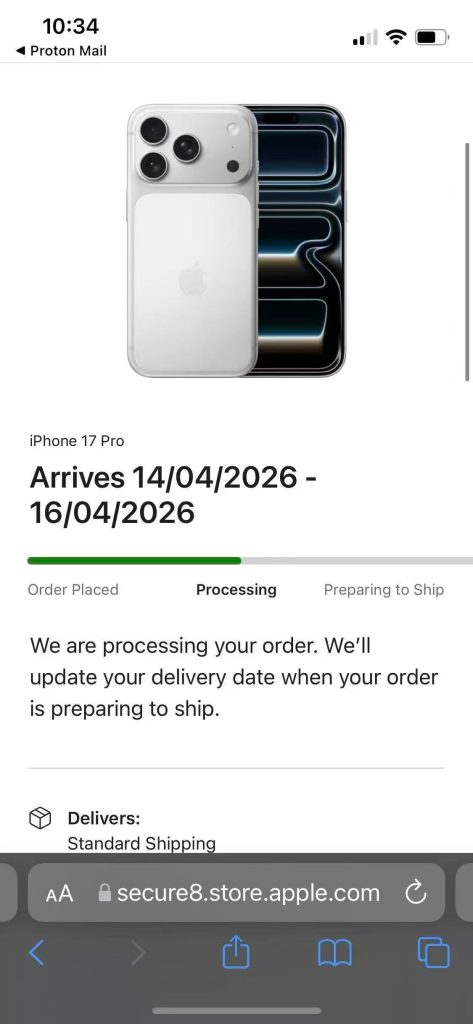
The delivery estimate was April 14–16, 2026. Even though it meant waiting nearly two weeks, I accepted it without complaint. Unfortunately, things went downhill from there.
Things started to go wrong when the promised last date of arrival had already passed, and it still says “Processing”.
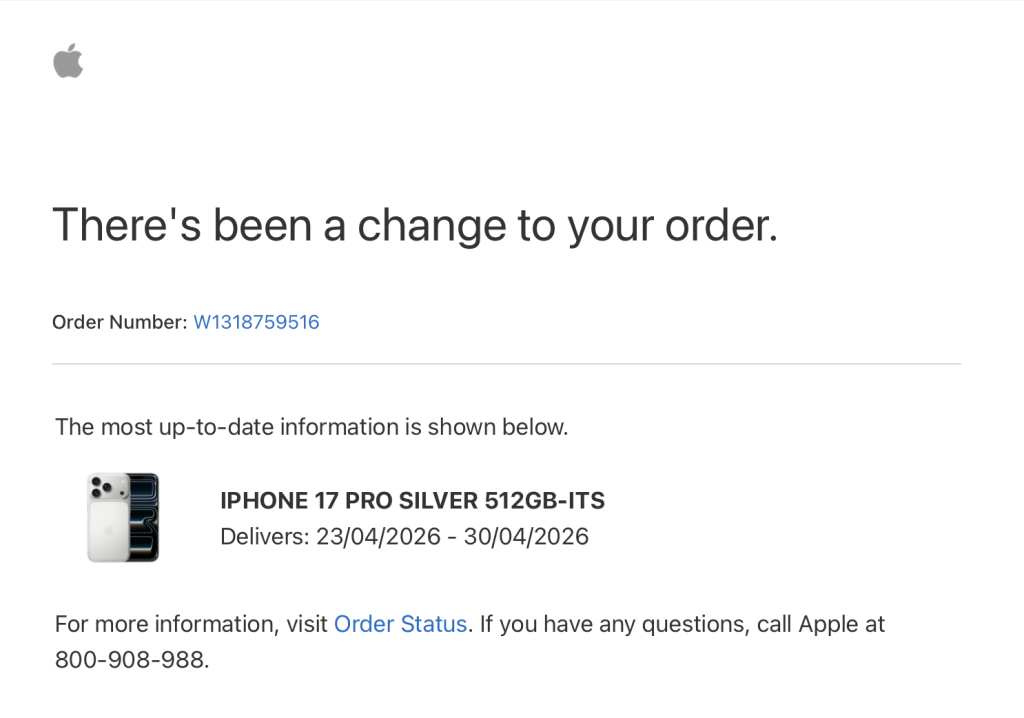
I opened my email and checked the latest email from Apple Store really shocked me

I thought that’s okay, so I waited
I also gave Apple Support feedback via online chat. But nothing helps
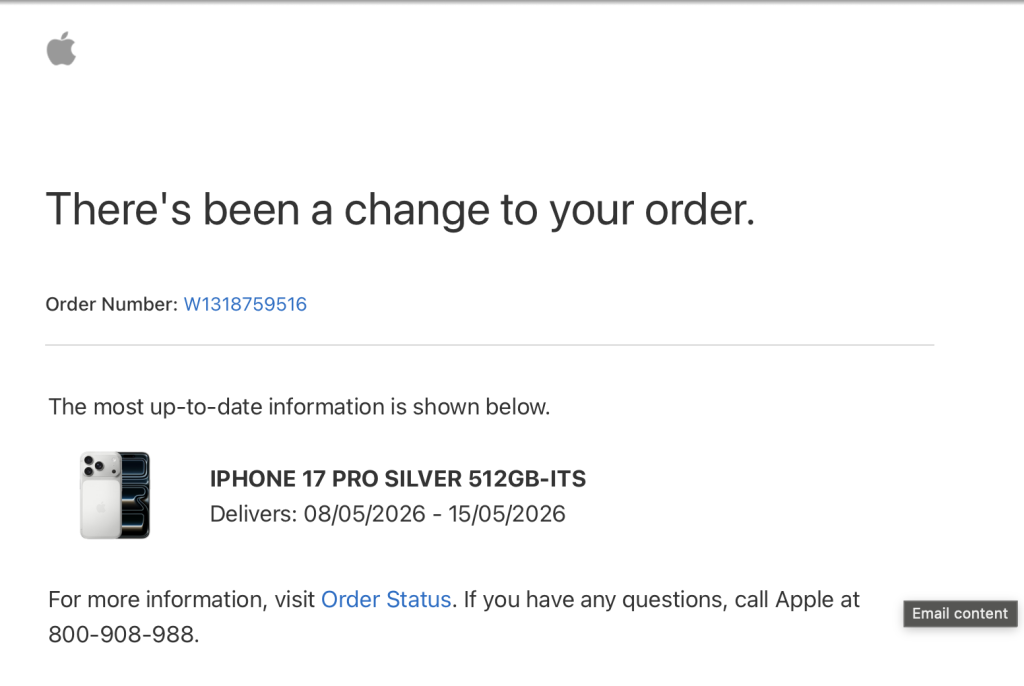
I waited till April 30th

It happened again, still stuck in Processing and the arrival date has been delayed again
Waiting for 1 month for a phone has already made me frustrated. You’re asking me to wait for another half a month, and still have a chance of delaying again?
I called Apple Support. The Specialist is really nice, really, she said she would let their colleagues double-check my order and set my order to priority. Then, I waited for the feedback email on my complaint from Apple.
Two emails I have received after submitting a complaint:

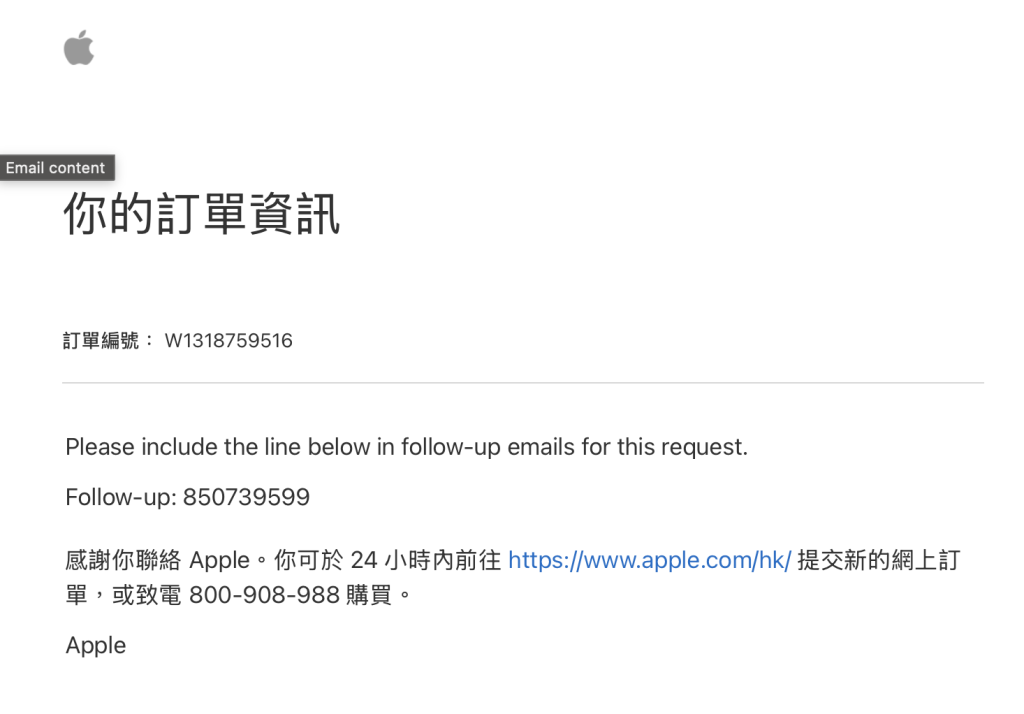
Chinese meaning: Thanks for contacting Apple. You can submit a new online order through https://www.apple.com/hk/ or call 800-908-888 to purchase.
I can’t believe my eyes

I have no words to say.
This is definitely not a rely from a complaint that should be. This is obviously an Invoice.
I can’t understand what Apple was doing
Until then, May 2nd, I have no other progress or reply from Apple at all.
Questions for Apple
Your Specialist said that in Hong Kong, the iPhone 17 Pro is very popular, so this device is currently out of stock.
My question is, why in the Mainland, every Apple Store I have seen in GuangDong, ShenZhen are available for pick-up?
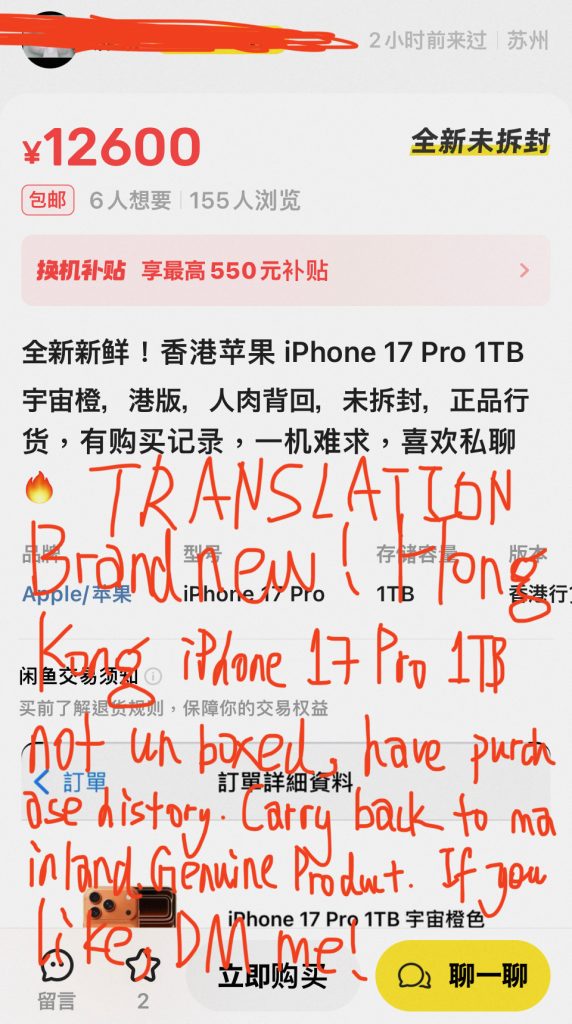
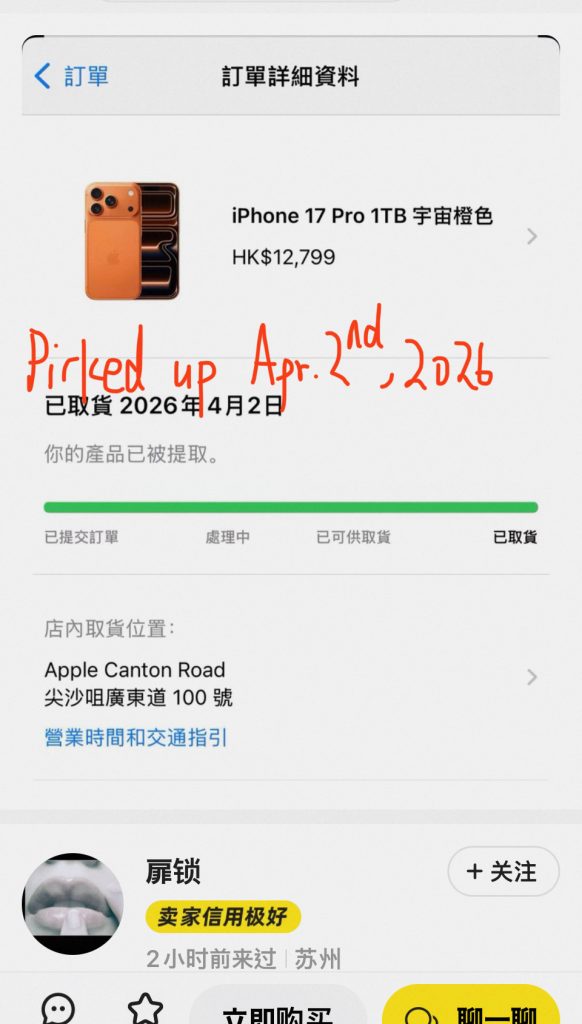
The most confusing is why I have seen there are scalpers in Goofish(A Chinese second-hand trade platform like eBay or Carousell) who can purchase pick-up iPhones, and sell them to others at increased prices to make a profit?


How did Apple manage its inventories?


The End
www.pcl2.topFinal Update on May 5th
On May 5, I suddenly received a shipping notification — and the phone arrived the same day.
You should not fully trust Apple’s estimated delivery dates.
-
Bring your website alive on Tor
In this tutorial, I will show you exactly how to host your website on the Tor network and make it accessible via a .onion address.
I wrote this guide based on Debian, but you can easily apply it to most Linux distributions.
First, update your system and install the Tor package by running these commands:
sudo apt update
sudo apt install torNext, open the Tor configuration file:
sudo nano /etc/tor/torrc
Tor v3 offers better security, so I strongly recommend using it. Scroll to the bottom of the file and add these three lines:
HiddenServiceDir /var/lib/tor/[Replace this folder name]/
HiddenServiceVersion 3
HiddenServicePort 80 127.0.0.1:80Note: Change the HiddenServicePort if your website runs on a different port.
After editing, restart Tor.
sudo systemctl restart tor
This command displays your unique .onion address (for example: k7sroz6qru2uzydjvylpnxgitxkswcib7gimuf3q4pklh3frkx52r4qd.onion).
sudo cat /var/lib/tor/[Replace this folder name]/hostname
Set permission:
sudo chown -R debian-tor:debian-tor /var/lib/tor/[Replace]/
sudo chmod 700 /var/lib/tor/[Replace]/Use Tor Browser and access your website. If everything is set properly, you should see your website alive on the Dark Web.
Optional: Custom .onion Domain prefix
If you don’t like the random .onion address generated by Tor and want your dark web domain to start with specific characters, you can read this optional section and generate a Vanity Address.
First, you need to consider the time taken to generate a Vanity Address. It depends on the CPU performance, the number of characters you want to customize at the beginning of the domain name, and luck.
A table of time taken to generate a Vanity Address by using a 1.5GHz CPU is shown below.
Characters Approximately Time 1~3 <1 second 4 2 seconds 5 1 minute 6 30 minutes 7 1 day 8 25 days 9 years 10 40 years 11 640 years 12 10000 years 13 640000 years 14 2600000 years For reference only. Currently, I recommend using mkp224o to generate v3 Vanity address.
Build mkp224o first. It only needs to be built once.
git clone https://github.com/cathugger/mkp224o.git
cd mkp224o
./autogen.sh && ./configure && make -j$(nproc)start to generate
./mkp224o -d ./my_onions -t $(nproc) -n [replace with the characters amount] [replace with the characters]
After generating, there will be
hostnameandhs_ed25519_secret_key, etc files in the folder.Apply the generated domain to Tor
Copy the generated folder to HiddenServiceDir
sudo cp -r ./my_onions/[replace]* /var/lib/tor/[replace]/
sudo chown -R debian-tor:debian-tor /var/lib/tor/[replace]/
sudo chmod 700 /var/lib/tor/[replace]/Restart Tor service:
sudo systemctl restart tor
Look at the Domain:
sudo cat /var/lib/tor/[replace]/hostname
Important Notice: After generating, please back up the
hs_ed25519_secret_keyfile. It is impossible to recover the domain if lost.The End
www.pcl2.top/k7sroz6qru2uzydjvylpnxgitxkswcib7gimuf3q4pklh3frkx52r4qd.onion -
How to show hidden files that begins with a dot (.)
Terminal Method: To list all files, including hidden ones, open the terminal and run:
ls -a
Graphical Interface Method: Within the graphical file browser, press Ctrl + H to toggle the visibility of hidden files.
-
Build your own WordPress Website
What you’d need:
- Domain Name
- VPS Server
I recommend you to use CloudFlare proxy your server. It will prevent DDoS attacks based on Domain Names. It is free.
Follow the tutorial on it and add your domain name to cloudflare.
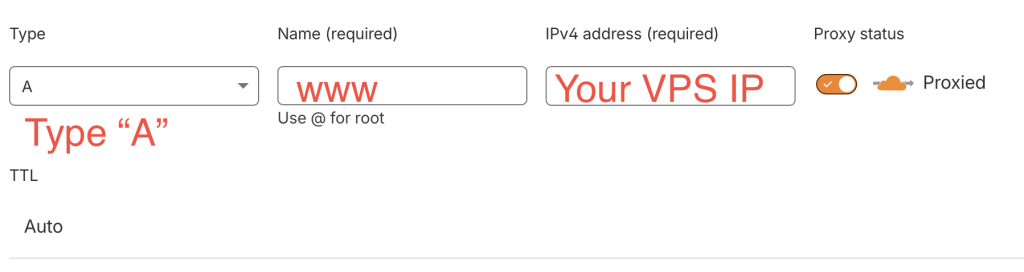
After setting up cloudflare, you should also set up the A record on it.
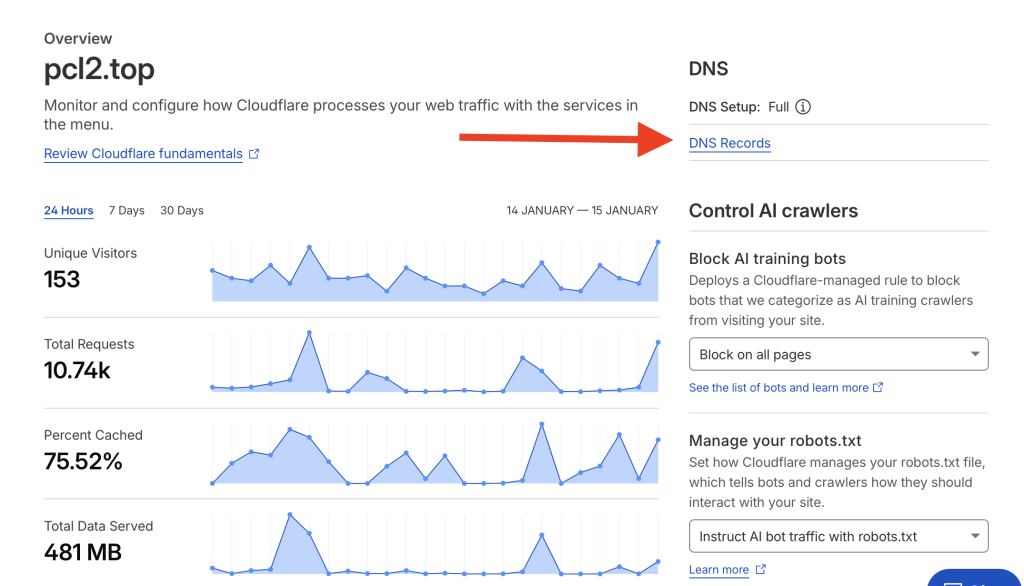
In Cloudflare Dashboard, click “DNS Record”.

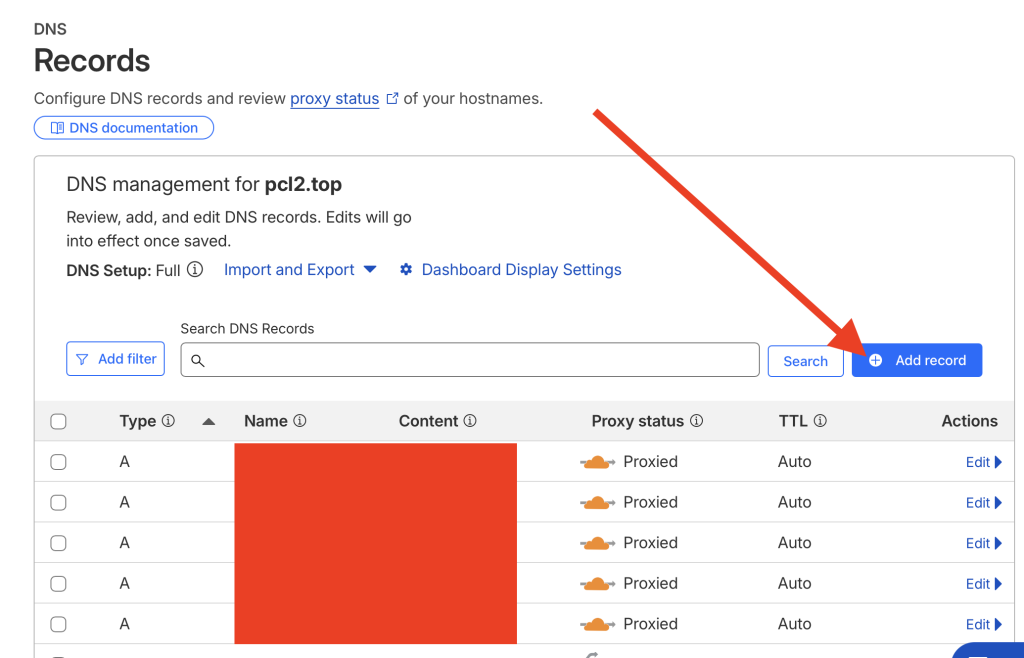
Add Record.


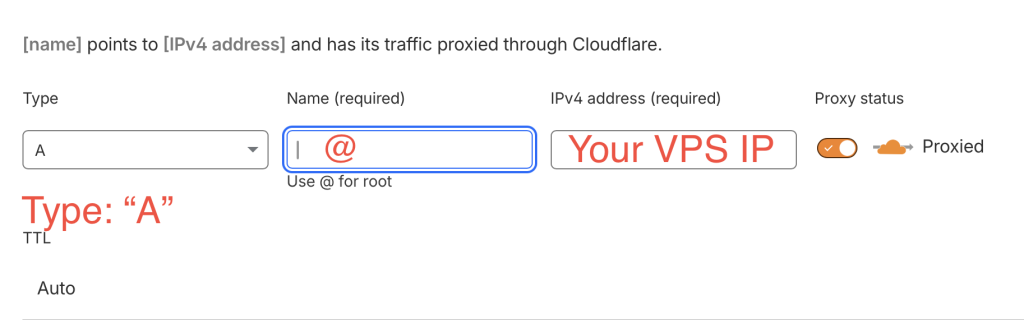
Add these two A Records. And you’re all set. Caution not to leak your VPS IP address, otherwise DDoS attackers might attack by using IP. After all, wait for 10~60 minutes for the DNS Record been added on your region’s DNS server.
Install a server panel ( I will use aapanel as an example here, but it depends on you.)
Install Script:
URL=https://www.aapanel.com/script/install_7.0_en.sh && if [ -f /usr/bin/curl ];then curl -ksSO "$URL" ;else wget --no-check-certificate -O install_7.0_en.sh "$URL";fi;bash install_7.0_en.sh forum
Install as
rootuserroot@vultr:~# URL=https://www.aapanel.com/script/install_7.0_en.sh && if [ -f /usr/bin/curl ];then curl -ksSO "$URL" ;else wget --no-check-certificate -O install_7.0_en.sh "$URL";fi;bash install_7.0_en.sh forum
+----------------------------------------------------------------------
| aaPanel FOR CentOS/Ubuntu/Debian
+----------------------------------------------------------------------
| Copyright © 2015-2099 BT-SOFT(https://www.aapanel.com) All rights reserved.
+----------------------------------------------------------------------
| The WebPanel URL will be https://SERVER_IP:31750 when installed.
+----------------------------------------------------------------------
Do you want to install aaPanel to the /www directory now?(y/n):If you use a
normal userto execute the installation script, you will get the following promptaapanel@vultr:~$ URL=https://www.aapanel.com/script/install_7.0_en.sh && if [ -f /usr/bin/curl ];then curl -ksSO "$URL" ;else wget --no-check-certificate -O install_7.0_en.sh "$URL";fi;bash install_7.0_en.sh forum
Non-root install, please try the following solutions:
1.Please switch to [root] user install
2.Try executing the following install commands:
sudo bash install_7.0_en.sh forum
aapanel@vultr:~$You can use
sudo -iorsucommand to switch to root user.==================================================================
Congratulations! Installed successfully!
==================================================================
aaPanel Internet Address: https://your_ip_address:31750/abcdefg
aaPanel Internal Address: https://your_ip_address:31750/abcdefg
username: abcdefgh
password: abcdefgh
Warning:
If you cannot access the panel,
release the following port (31750|888|80|443|20|21) in the security group
==================================================================
Time consumed: 1 Minute!Open your browser and visit the link shown. And login by using the credentials shown.
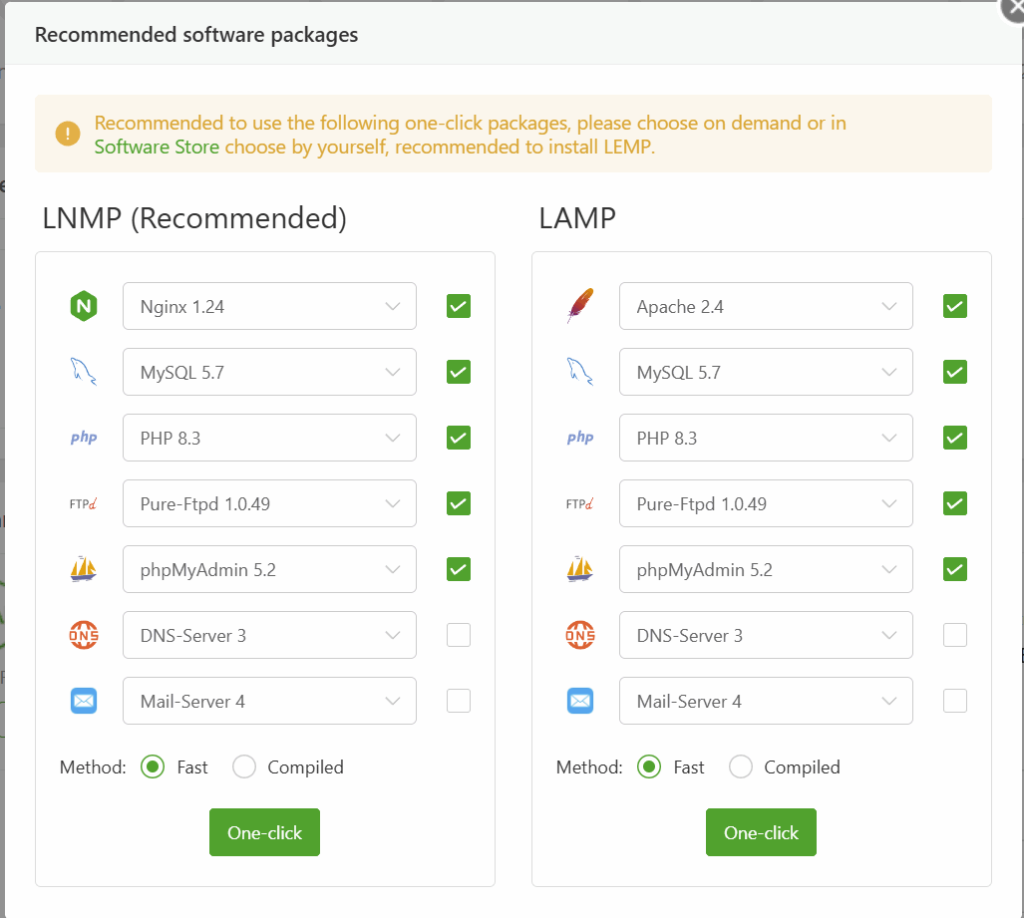
Then, in this page, choose LNMP environment, and click install button below.

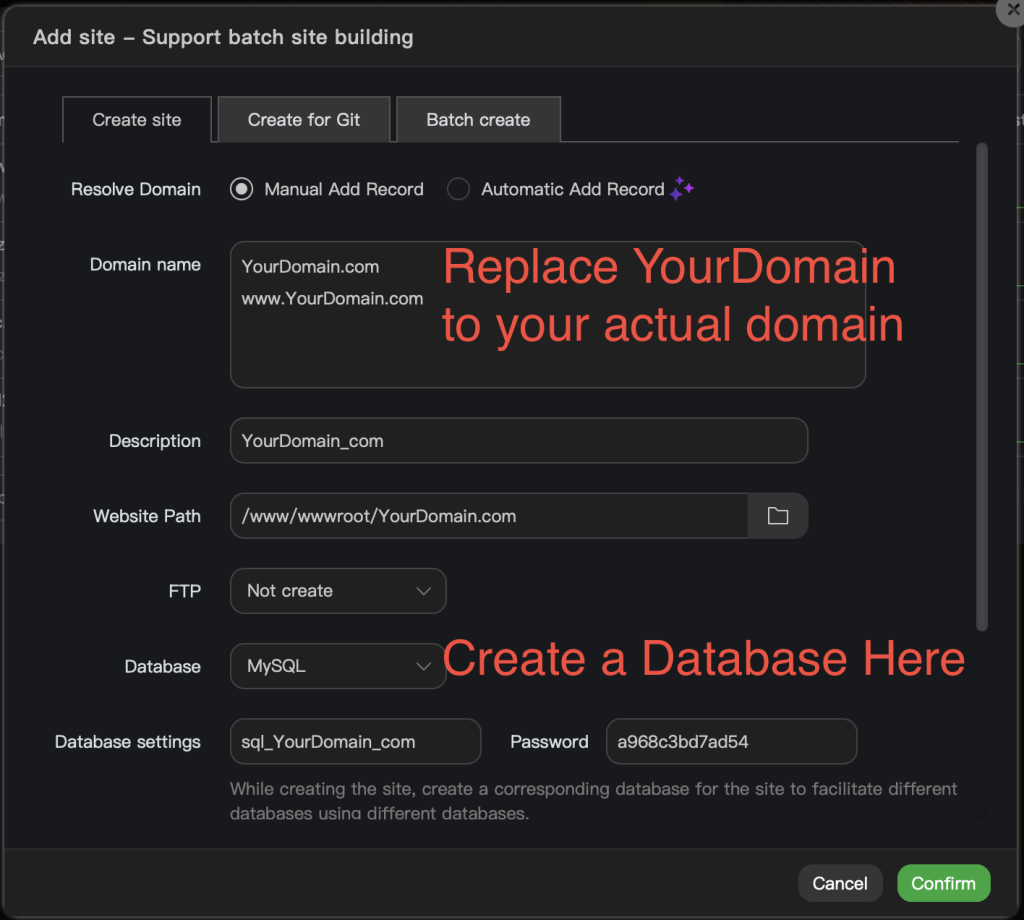
After installation, click on “Website”, and click


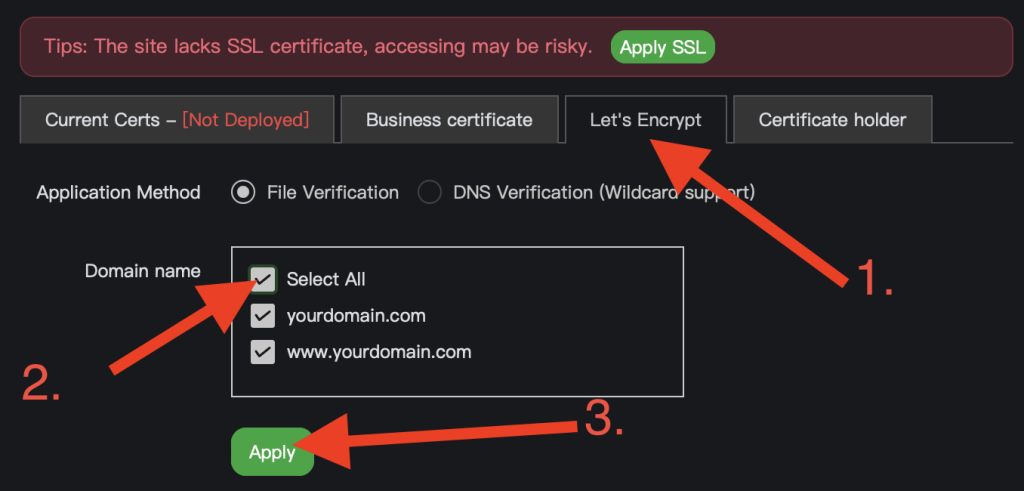
It is recommended to set up SSL Certificate. It removes the “Not Safe” label and also enchants the safety. Click on the Not Set text.


Wait a moment, then the SSL certificate will be applied successfully. It is recommended to turn on Force HTTPS.
Then, Download WordPress.
you will download a zip file.
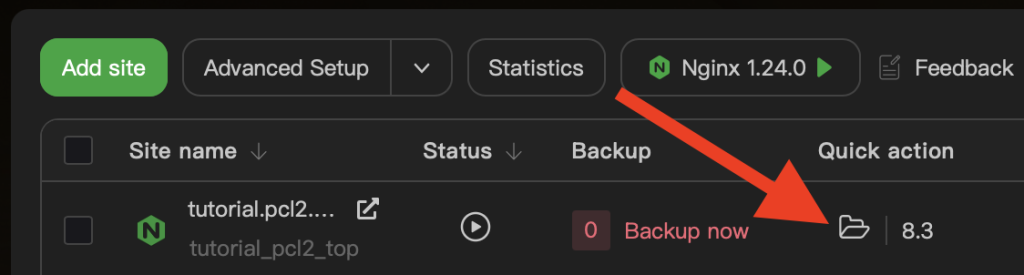
Click on the folder icon.


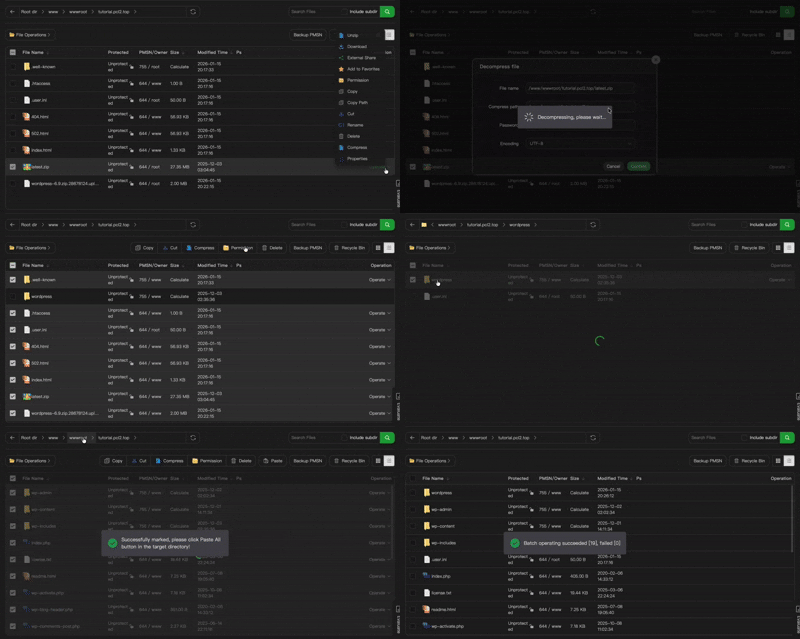
File Operations > Upload. And Upload the zip file. And Unzip it. It would generate a WordPress file. Open it, select all, Cut, back to the previous folder, and paste.

its a little bit blur but you can still get the general idea tho
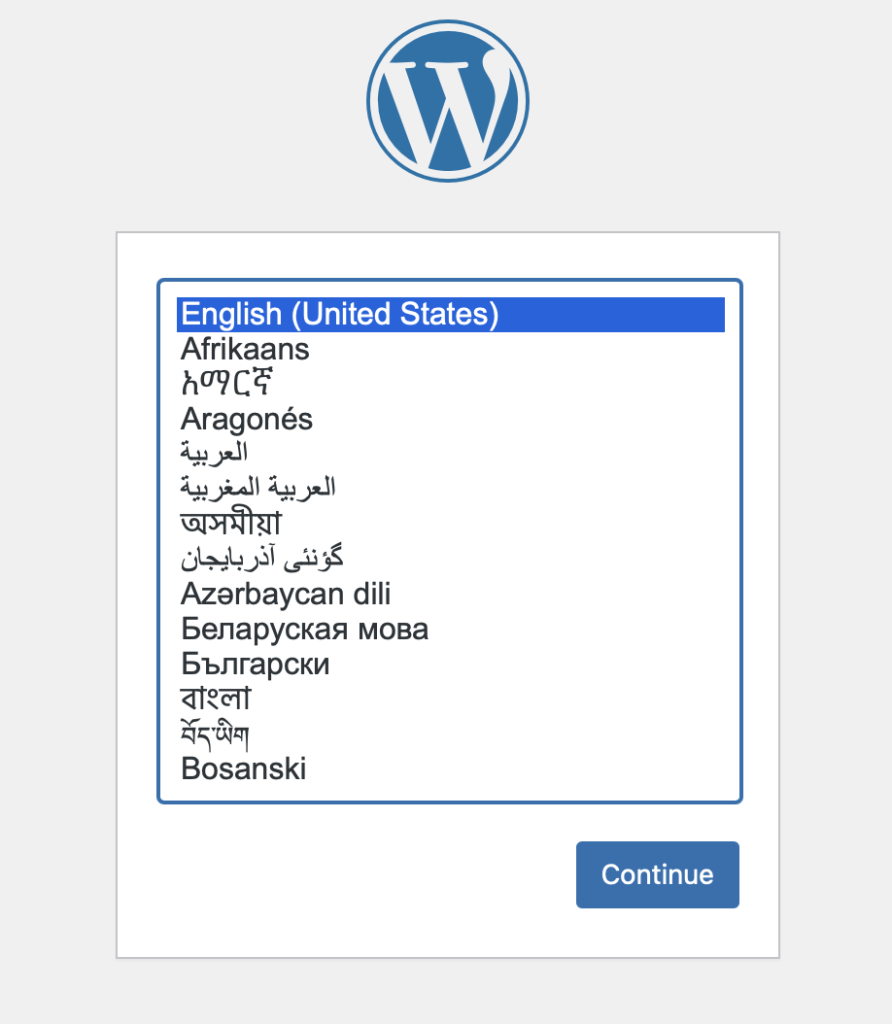
Then, visit your website.

This Page will show up. Click on your language and hit continue.
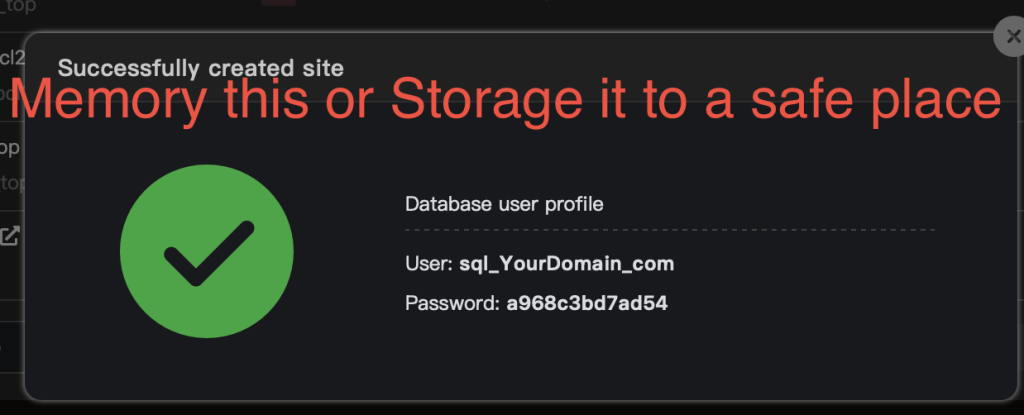
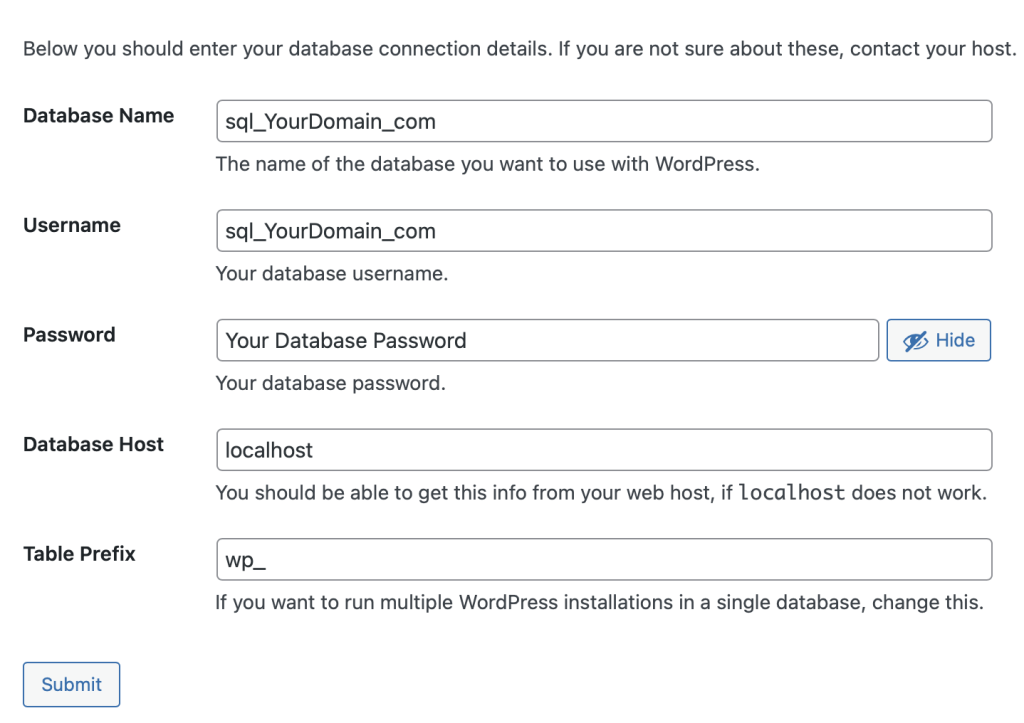
Remember the Database user profile? In this step we need it. Fill it into the gap.

And click on Submit Button. All done, enjoy building your website!
-
Build VPN by using a VPS server
告警:先看看你所在的国家/地区的法律是否允许你这样做。此文章仅作学习用途。必须用于合法用途,本人不承担任何责任。
相关法律法规
摘要中华人民共和国计算机信息网络国际联网管理暂行规定
(1996年2月1日中华人民共和国国务院令第195号发布 根据1997年5月20日《国务院关于修改〈中华人民共和国计算机信息网络国际联网管理暂行规定〉的决定》修正)
第一条 为了加强对计算机信息网络国际联网的管理,保障国际计算机信息交流的健康发展,制定本规定。
第二条 中华人民共和国境内的计算机信息网络进行国际联网,应当依照本规定办理。
第三条 本规定下列用语的含义是:
(一)计算机信息网络国际联网(以下简称国际联网),是指中华人民共和国境内的计算机信息网络为实现信息的国际交流,同外国的计算机信息网络相联接。
(二)互联网络,是指直接进行国际联网的计算机信息网络;互联单位,是指负责互联网络运行的单位。
(三)接入网络,是指通过接入互联网络进行国际联网的计算机信息网络;接入单位,是指负责接入网络运行的单位。
第六条 计算机信息网络直接进行国际联网,必须使用邮电部国家公用电信网提供的国际出入口信道。
任何单位和个人不得自行建立或者使用其他信道进行国际联网。
第八条 接入网络必须通过互联网络进行国际联网。
接入单位拟从事国际联网经营活动的,应当向有权受理从事国际联网经营活动申请的互联单位主管部门或者主管单位申请领取国际联网经营许可证;未取得国际联网经营许可证的,不得从事国际联网经营业务。
接入单位拟从事非经营活动的,应当报经有权受理从事非经营活动申请的互联单位主管部门或者主管单位审批;未经批准的,不得接入互联网络进行国际联网。
申请领取国际联网经营许可证或者办理审批手续时,应当提供其计算机信息网络的性质、应用范围和主机地址等资料。
国际联网经营许可证的格式,由领导小组统一制定。
第十条 个人、法人和其他组织(以下统称用户)使用的计算机或者计算机信息网络,需要进行国际联网的,必须通过接入网络进行国际联网。
前款规定的计算机或者计算机信息网络,需要接入网络的,应当征得接入单位的同意,并办理登记手续。
第十三条 从事国际联网业务的单位和个人,应当遵守国家有关法律、行政法规,严格执行安全保密制度,不得利用国际联网从事危害国家安全、泄露国家秘密等违法犯罪活动,不得制作、查阅、复制和传播妨碍社会治安的信息和淫秽色情等信息。
All you need to prepare:
- A VPS Server.
- A ssh software.
- A Computer.
- Basic acknowledgment of Linux Operating System.
- Patience.
My VPS server OS is Debian x12. So let’s start!
First of all, let’s Update APT Package List.
apt get update
Install shadowsocks-libev.
apt install shadowsocks-libev
If it says E: Unable to locate package shadowsocks-libev
Try to update your APT package list first.
apt get update
And then install shadowsocks-libev.
apt install shadowsocks-libev
If the error occurred again, your APT repository might be outdated. Let’s fix that by modifying the sources.list file in /etc/apt/.
nano /etc/apt/sources.list
And insert these into this file.
deb http://archive.ubuntu.com/ubuntu focal main restricted universe multiverse
deb http://archive.ubuntu.com/ubuntu focal-updates main restricted universe multiverse
deb http://security.ubuntu.com/ubuntu focal-security main restricted universe multiverseNow, use apt update again, an error might occur:
The following signatures couldn't be verified because the public key is not available: NO_PUBKEY 3B4FE6ACC0B21F32 NO_PUBKEY 871920D1991BC93C
The solution is you need to manually add the missing GPG key.
sudo apt-key adv --keyserver keyserver.ubuntu.com --recv-keys 3B4FE6ACC0B21F32 871920D1991BC93C
Everyone’s GPG might be different.
Now, use apt update, the issue might be solved. If the issue still there, ask AI
After installing, open the configuration file which is /etc/shadowsocks-libev/config.json.
nano /etc/shadowsocks-libev/config.json
At the second line, which says
server:["::1", "127.0.0.1"]
Delete text after server: , and replace it with 0.0.0.0. If your IP address is IPV6, then use :: (double colon). It could let shadowsocks-libev listen all addresses.
Save and quit, restart shadowsocks-libev service by using:
systemctl restart shadowsocks-libev
You might need to allow the shadowsocks-libev port, which is 8388 by default.
ufw allow 8388
Make sure the port is listening:
ss -lnpt | grep 8388
If the output is
LISTEN 0 1024 66.154.109.36:8388 0.0.0.0:* users:(("ss-server",pid=525,fd=5))Then the shadowsocks-libev is running normally.
Open your proxy utility app, I will use shadowrocket here.

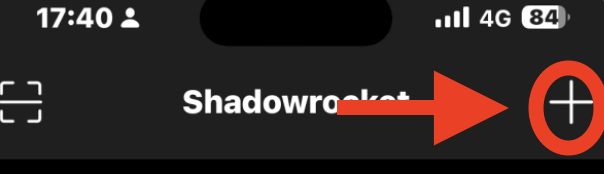
Click on the “+”.

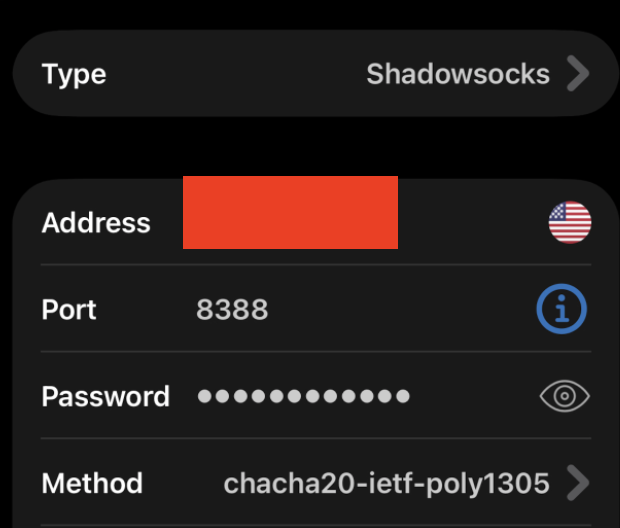
Fill the credentials according to your shadowsocks configuration file.
Caution: If you are using cloudflare, then do NOT fill the domain name, fill the IP address.
Click on “Save” after filling credentials.

Click on the “T” after Connectivity Test.

Click on “CONNECT”.

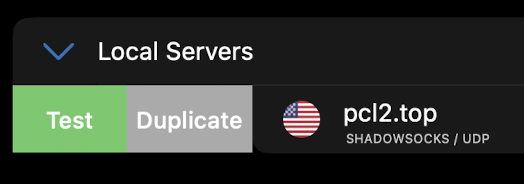
Your VPN should appear on the main menu. Swipe from left to right and click on “Test” button and see if the server is connectable.

Normally it would show the ms value. If it show up “Timeout”, check your configuration or restart.
Click on your server, and set the “global routing” to “proxy”.
Visit ipconfig.me website or any of the website which could show your IP address.
Check if the IP address is as same as your VPS address.
The End
Written by Evandrel