Evandrel's Homepage

https://www.pcl2.top

Category: tutorials

  • Bring your website alive on Tor

    In this tutorial, I will show you exactly how to host your website on the Tor network and make it accessible via a .onion address.

    I wrote this guide based on Debian, but you can easily apply it to most Linux distributions.

    First, update your system and install the Tor package by running these commands:

    sudo apt update
    sudo apt install tor

    Next, open the Tor configuration file:

    sudo nano /etc/tor/torrc

    Tor v3 offers better security, so I strongly recommend using it. Scroll to the bottom of the file and add these three lines:

    HiddenServiceDir /var/lib/tor/[Replace this folder name]/
    HiddenServiceVersion 3
    HiddenServicePort 80 127.0.0.1:80

    Note: Change the HiddenServicePort if your website runs on a different port.

    After editing, restart Tor.

    sudo systemctl restart tor

    This command displays your unique .onion address (for example: k7sroz6qru2uzydjvylpnxgitxkswcib7gimuf3q4pklh3frkx52r4qd.onion).

    sudo cat /var/lib/tor/[Replace this folder name]/hostname

    Set permission:

    sudo chown -R debian-tor:debian-tor /var/lib/tor/[Replace]/
    sudo chmod 700 /var/lib/tor/[Replace]/

    Use Tor Browser and access your website. If everything is set properly, you should see your website alive on the Dark Web.

    Optional: Custom .onion Domain prefix

    If you don’t like the random .onion address generated by Tor and want your dark web domain to start with specific characters, you can read this optional section and generate a Vanity Address.

    First, you need to consider the time taken to generate a Vanity Address. It depends on the CPU performance, the number of characters you want to customize at the beginning of the domain name, and luck.

    A table of time taken to generate a Vanity Address by using a 1.5GHz CPU is shown below.

    CharactersApproximately Time
    1~3<1 second
    42 seconds
    51 minute
    630 minutes
    71 day
    825 days
    92122 \frac{1}{2} years
    1040 years
    11640 years
    1210000 years
    13640000 years
    142600000 years
    For reference only.

    Currently, I recommend using mkp224o to generate v3 Vanity address.

    Build mkp224o first. It only needs to be built once.

    git clone https://github.com/cathugger/mkp224o.git
    cd mkp224o
    ./autogen.sh && ./configure && make -j$(nproc)

    start to generate

    ./mkp224o -d ./my_onions -t $(nproc) -n [replace with the characters amount] [replace with the characters]

    After generating, there will be hostname and hs_ed25519_secret_key, etc files in the folder.

    Apply the generated domain to Tor

    Copy the generated folder to HiddenServiceDir

    sudo cp -r ./my_onions/[replace]* /var/lib/tor/[replace]/
    sudo chown -R debian-tor:debian-tor /var/lib/tor/[replace]/
    sudo chmod 700 /var/lib/tor/[replace]/

    Restart Tor service:

    sudo systemctl restart tor

    Look at the Domain:

    sudo cat /var/lib/tor/[replace]/hostname

    Important Notice: After generating, please back up the hs_ed25519_secret_key file. It is impossible to recover the domain if lost.

    The End

    www.pcl2.top/k7sroz6qru2uzydjvylpnxgitxkswcib7gimuf3q4pklh3frkx52r4qd.onion
  • How to show hidden files that begins with a dot (.)

    Terminal Method: To list all files, including hidden ones, open the terminal and run:

    ls -a

    Graphical Interface Method: Within the graphical file browser, press Ctrl + H to toggle the visibility of hidden files.

  • Build your own WordPress Website

    What you’d need:

    • Domain Name
    • VPS Server

    I recommend you to use CloudFlare proxy your server. It will prevent DDoS attacks based on Domain Names. It is free.

    Follow the tutorial on it and add your domain name to cloudflare.

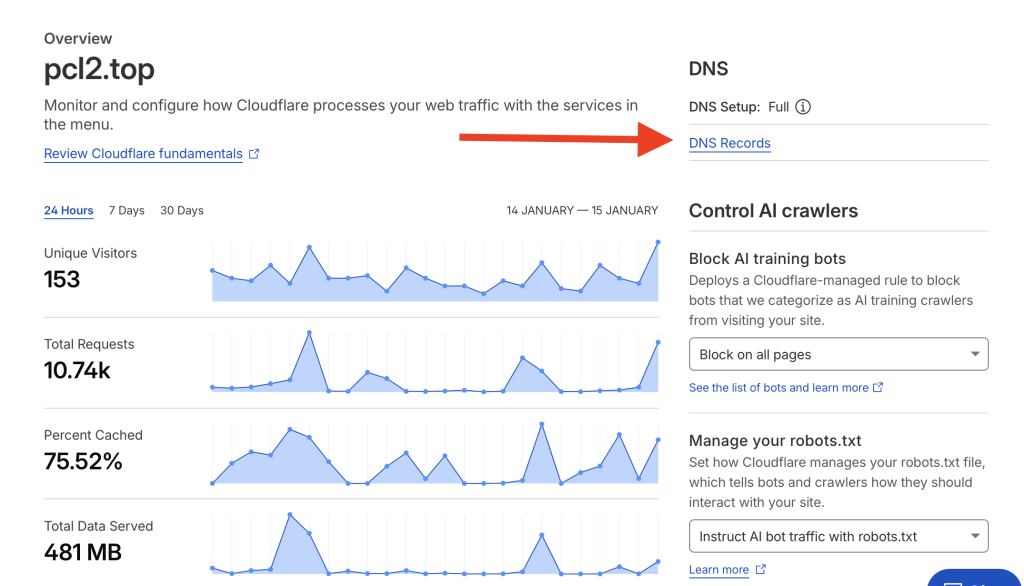
    After setting up cloudflare, you should also set up the A record on it.

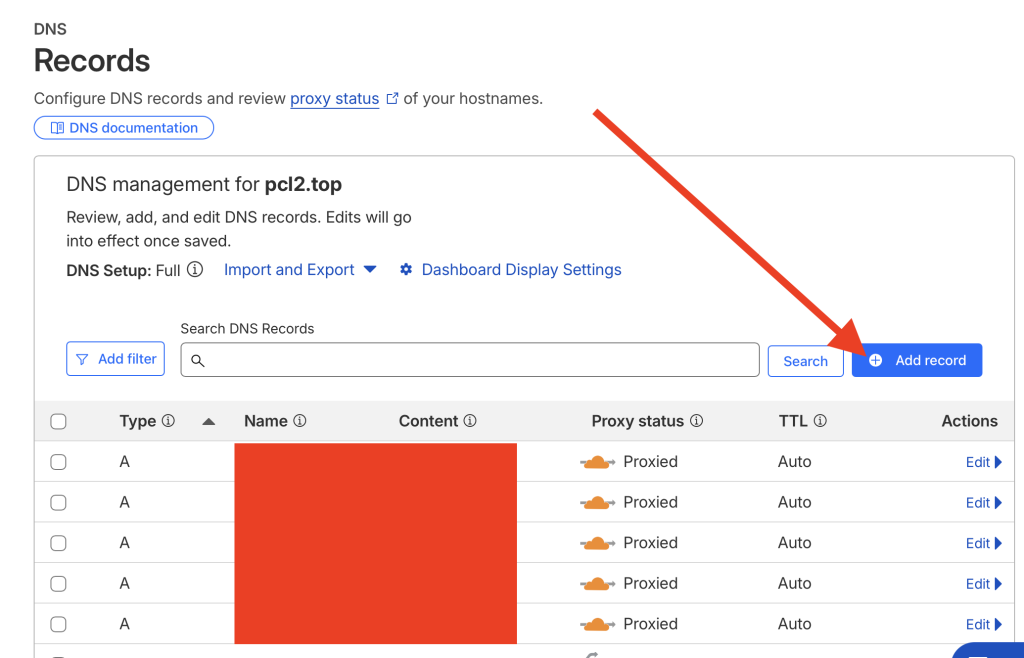
    In Cloudflare Dashboard, click “DNS Record”.

    Add Record.

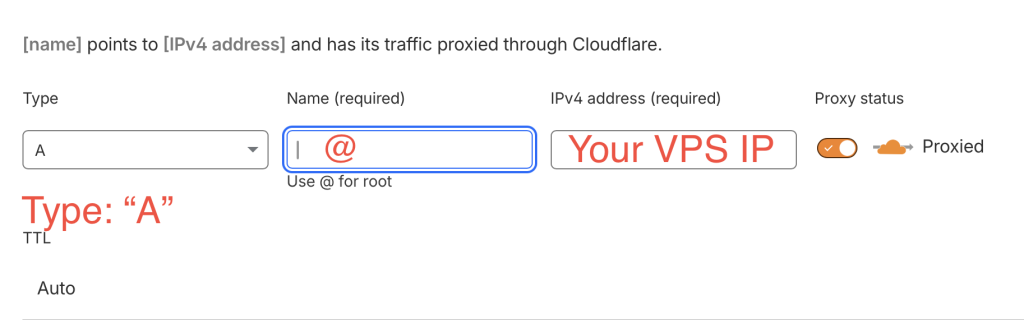
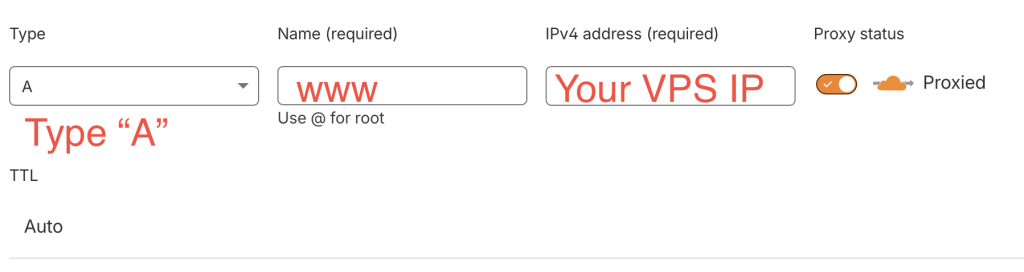
    Add these two A Records. And you’re all set. Caution not to leak your VPS IP address, otherwise DDoS attackers might attack by using IP. After all, wait for 10~60 minutes for the DNS Record been added on your region’s DNS server.


    Install a server panel ( I will use aapanel as an example here, but it depends on you.)

    Install Script:

    URL=https://www.aapanel.com/script/install_7.0_en.sh && if [ -f /usr/bin/curl ];then curl -ksSO "$URL" ;else wget --no-check-certificate -O install_7.0_en.sh "$URL";fi;bash install_7.0_en.sh forum

    Install as root user

    root@vultr:~# URL=https://www.aapanel.com/script/install_7.0_en.sh && if [ -f /usr/bin/curl ];then curl -ksSO "$URL" ;else wget --no-check-certificate -O install_7.0_en.sh "$URL";fi;bash install_7.0_en.sh forum

    +----------------------------------------------------------------------
    | aaPanel FOR CentOS/Ubuntu/Debian
    +----------------------------------------------------------------------
    | Copyright © 2015-2099 BT-SOFT(https://www.aapanel.com) All rights reserved.
    +----------------------------------------------------------------------
    | The WebPanel URL will be https://SERVER_IP:31750 when installed.
    +----------------------------------------------------------------------

    Do you want to install aaPanel to the /www directory now?(y/n):

    If you use a normal user to execute the installation script, you will get the following prompt

    aapanel@vultr:~$ URL=https://www.aapanel.com/script/install_7.0_en.sh && if [ -f /usr/bin/curl ];then curl -ksSO "$URL" ;else wget --no-check-certificate -O install_7.0_en.sh "$URL";fi;bash install_7.0_en.sh forum
    Non-root install, please try the following solutions:
    1.Please switch to [root] user install
    2.Try executing the following install commands:
    sudo bash install_7.0_en.sh forum

    aapanel@vultr:~$

    You can use sudo -i or su command to switch to root user.

    ==================================================================
    Congratulations! Installed successfully!
    ==================================================================
    aaPanel Internet Address: https://your_ip_address:31750/abcdefg
    aaPanel Internal Address: https://your_ip_address:31750/abcdefg
    username: abcdefgh
    password: abcdefgh
    Warning:
    If you cannot access the panel,
    release the following port (31750|888|80|443|20|21) in the security group
    ==================================================================
    Time consumed: 1 Minute!

    Open your browser and visit the link shown. And login by using the credentials shown.

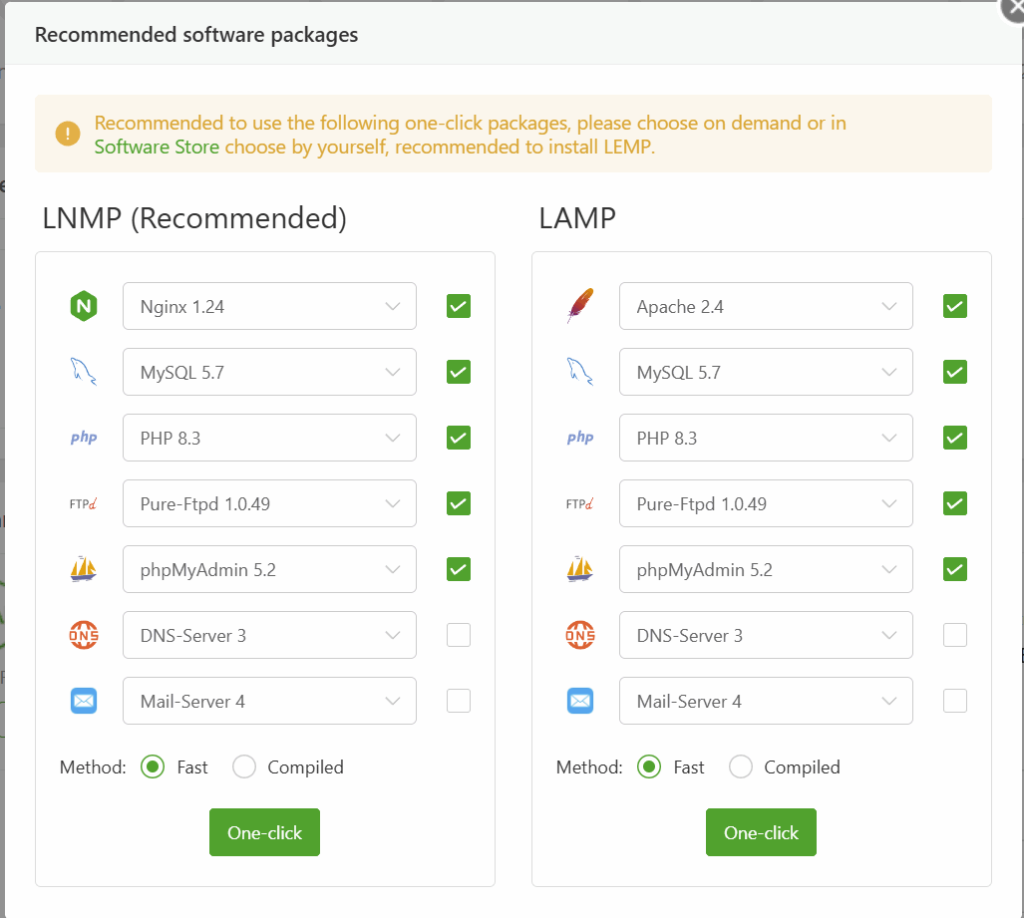
    Then, in this page, choose LNMP environment, and click install button below.

    After installation, click on “Website”, and click

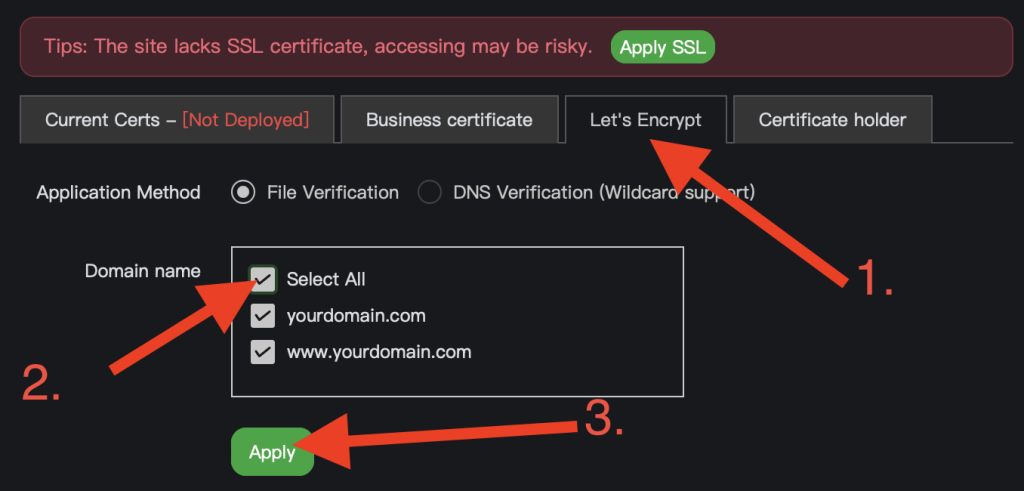
    It is recommended to set up SSL Certificate. It removes the “Not Safe” label and also enchants the safety. Click on the Not Set text.

    Wait a moment, then the SSL certificate will be applied successfully. It is recommended to turn on Force HTTPS.

    Then, Download WordPress.

    you will download a zip file.

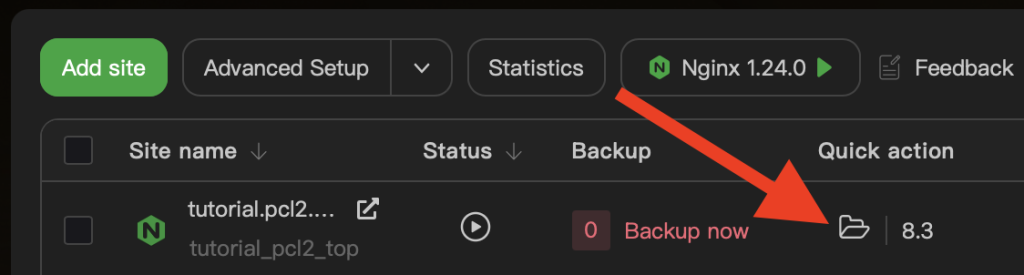
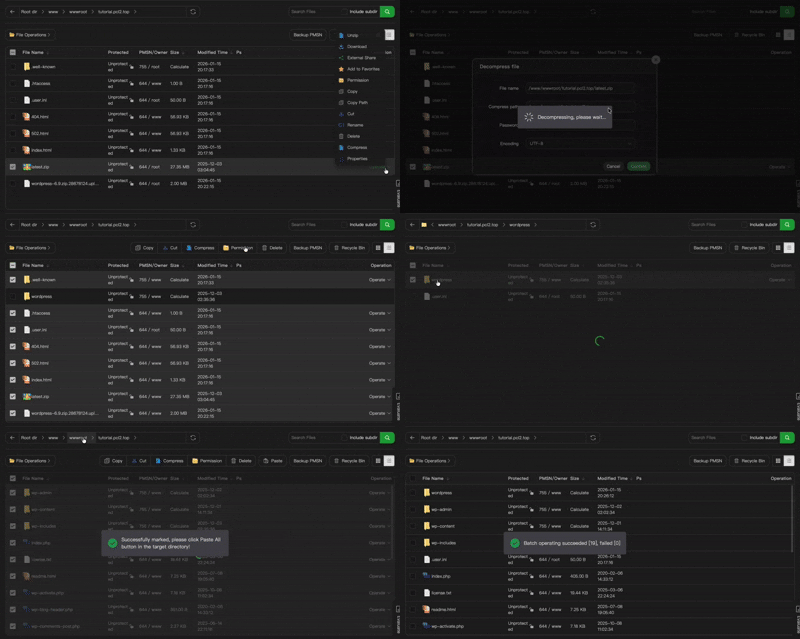
    Click on the folder icon.

    File Operations > Upload. And Upload the zip file. And Unzip it. It would generate a WordPress file. Open it, select all, Cut, back to the previous folder, and paste.

    its a little bit blur but you can still get the general idea tho

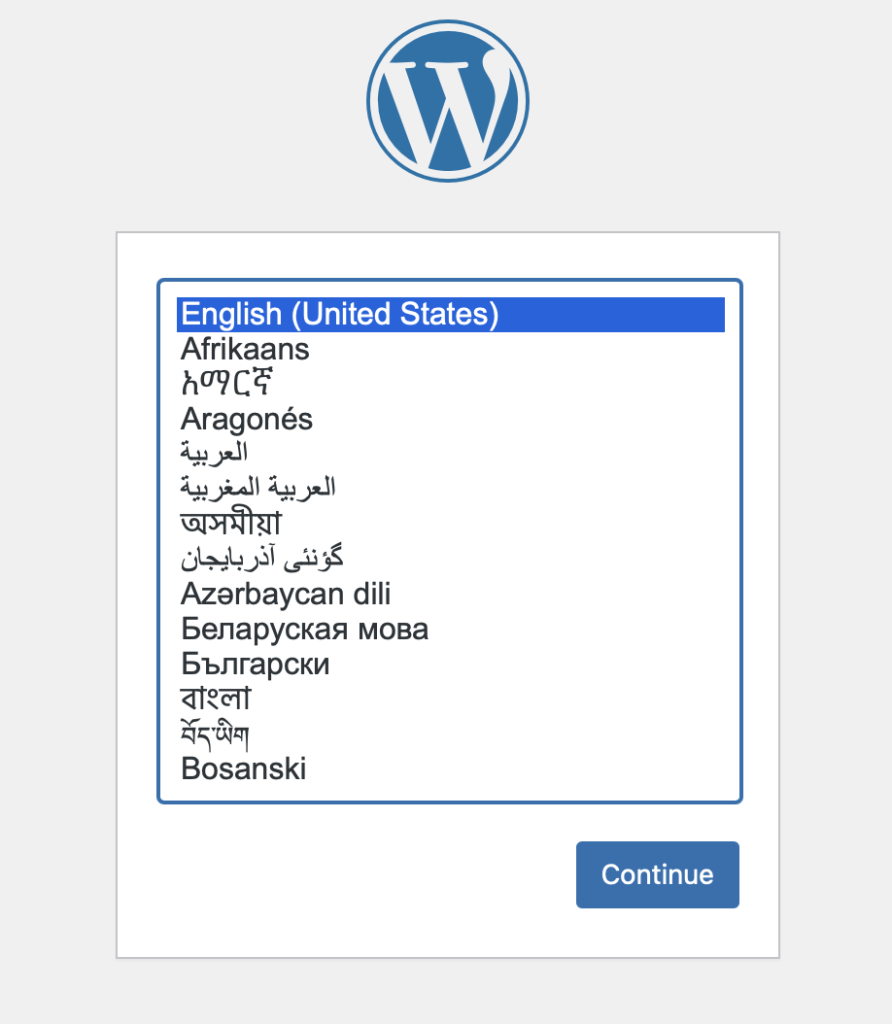
    Then, visit your website.

    This Page will show up. Click on your language and hit continue.

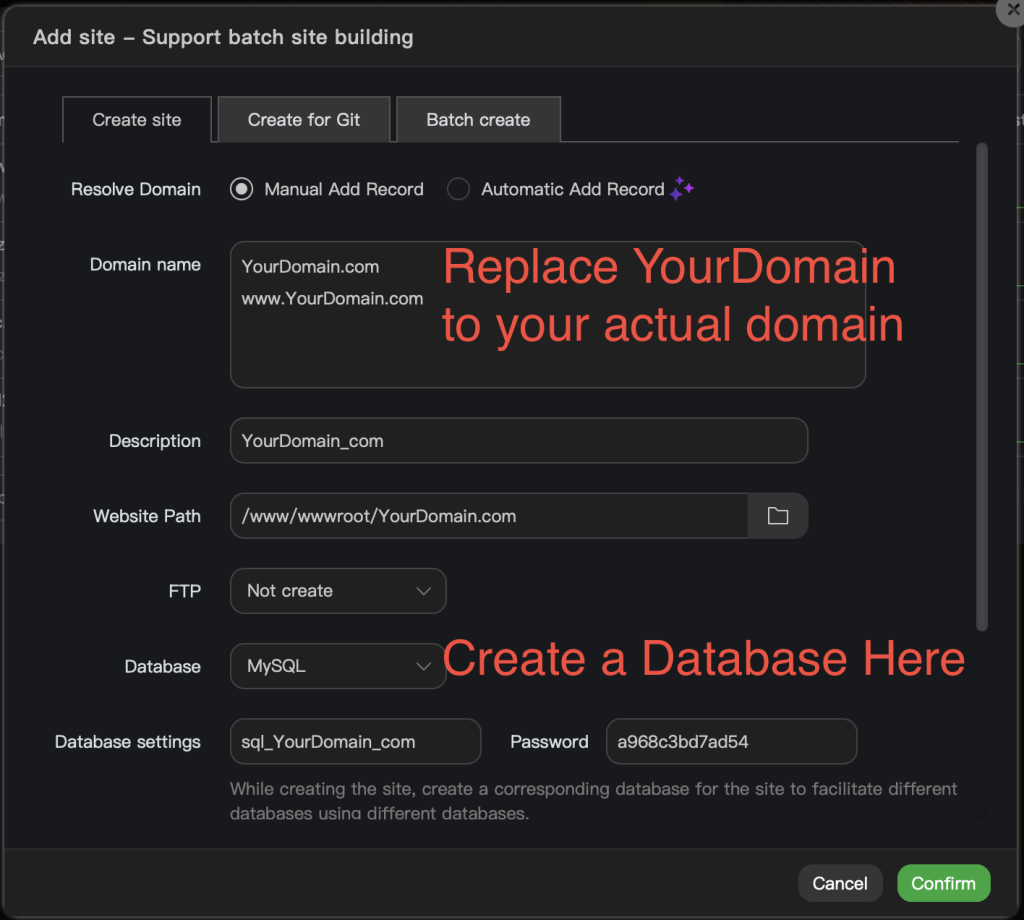
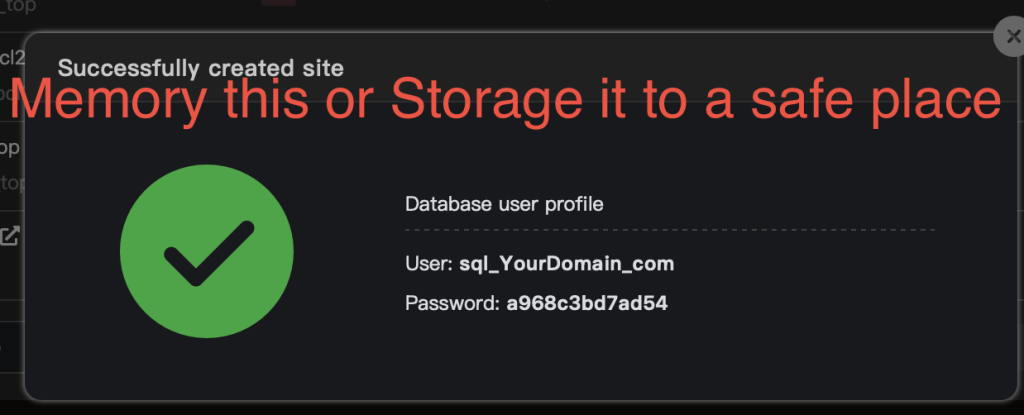
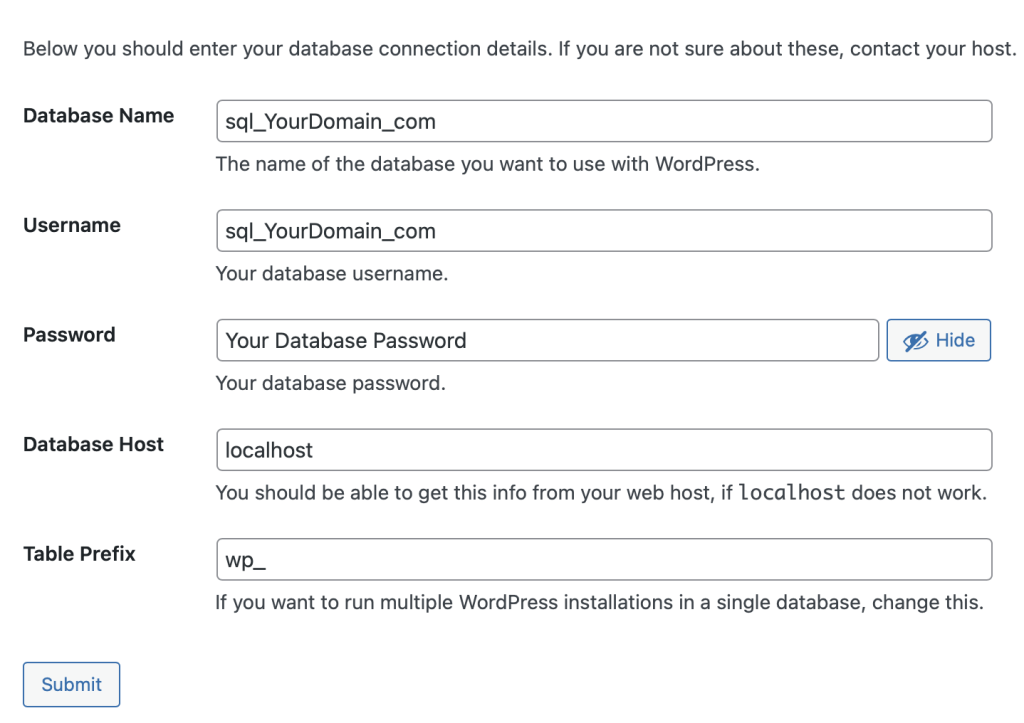
    Remember the Database user profile? In this step we need it. Fill it into the gap.

    And click on Submit Button. All done, enjoy building your website!

  • Build VPN by using a VPS server

    告警:先看看你所在的国家/地区的法律是否允许你这样做。此文章仅作学习用途。必须用于合法用途,本人不承担任何责任。

    相关法律法规摘要

    中华人民共和国计算机信息网络国际联网管理暂行规定

      (1996年2月1日中华人民共和国国务院令第195号发布 根据1997年5月20日《国务院关于修改〈中华人民共和国计算机信息网络国际联网管理暂行规定〉的决定》修正)

    第一条 为了加强对计算机信息网络国际联网的管理,保障国际计算机信息交流的健康发展,制定本规定。

    第二条 中华人民共和国境内的计算机信息网络进行国际联网,应当依照本规定办理。

    第三条 本规定下列用语的含义是:

    (一)计算机信息网络国际联网(以下简称国际联网),是指中华人民共和国境内的计算机信息网络为实现信息的国际交流,同外国的计算机信息网络相联接。

    (二)互联网络,是指直接进行国际联网的计算机信息网络;互联单位,是指负责互联网络运行的单位。

    (三)接入网络,是指通过接入互联网络进行国际联网的计算机信息网络;接入单位,是指负责接入网络运行的单位。

    第六条 计算机信息网络直接进行国际联网,必须使用邮电部国家公用电信网提供的国际出入口信道。

    任何单位和个人不得自行建立或者使用其他信道进行国际联网。

    第八条 接入网络必须通过互联网络进行国际联网。

    接入单位拟从事国际联网经营活动的,应当向有权受理从事国际联网经营活动申请的互联单位主管部门或者主管单位申请领取国际联网经营许可证;未取得国际联网经营许可证的,不得从事国际联网经营业务。

    接入单位拟从事非经营活动的,应当报经有权受理从事非经营活动申请的互联单位主管部门或者主管单位审批;未经批准的,不得接入互联网络进行国际联网。

    申请领取国际联网经营许可证或者办理审批手续时,应当提供其计算机信息网络的性质、应用范围和主机地址等资料。

    国际联网经营许可证的格式,由领导小组统一制定。

    第十条 个人、法人和其他组织(以下统称用户)使用的计算机或者计算机信息网络,需要进行国际联网的,必须通过接入网络进行国际联网。

    前款规定的计算机或者计算机信息网络,需要接入网络的,应当征得接入单位的同意,并办理登记手续。

    第十三条 从事国际联网业务的单位和个人,应当遵守国家有关法律、行政法规,严格执行安全保密制度,不得利用国际联网从事危害国家安全、泄露国家秘密等违法犯罪活动,不得制作、查阅、复制和传播妨碍社会治安的信息和淫秽色情等信息。

    All you need to prepare:

    • A VPS Server.
    • A ssh software.
    • A Computer.
    • Basic acknowledgment of Linux Operating System.
    • Patience.

    My VPS server OS is Debian x12. So let’s start!

    First of all, let’s Update APT Package List.

    apt get update

    Install shadowsocks-libev.

    apt install shadowsocks-libev

    After installing, open the configuration file which is /etc/shadowsocks-libev/config.json.

    nano /etc/shadowsocks-libev/config.json

    At the second line, which says

    server:["::1", "127.0.0.1"]

    Save and quit, restart shadowsocks-libev service by using:

    systemctl restart shadowsocks-libev

    You might need to allow the shadowsocks-libev port, which is 8388 by default.

    ufw allow 8388

    Make sure the port is listening:

    ss -lnpt | grep 8388

    If the output is

    LISTEN 0      1024   66.154.109.36:8388       0.0.0.0:*    users:(("ss-server",pid=525,fd=5))

    Then the shadowsocks-libev is running normally.

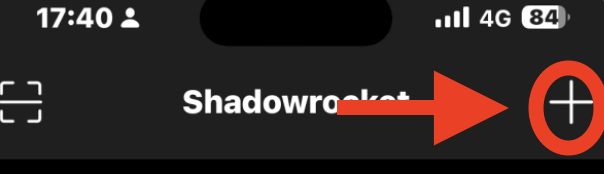
    Open your proxy utility app, I will use shadowrocket here.

    Click on the “+”.

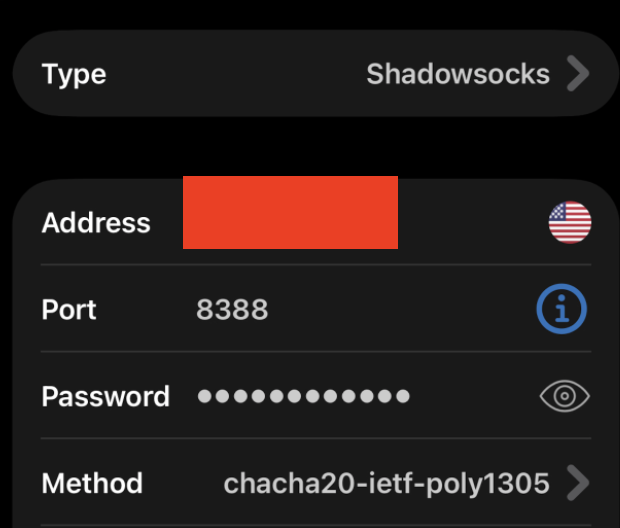
    Fill the credentials according to your shadowsocks configuration file.

    Caution: If you are using cloudflare, then do NOT fill the domain name, fill the IP address.

    Click on “Save” after filling credentials.

    Click on the “T” after Connectivity Test.

    Click on “CONNECT”.

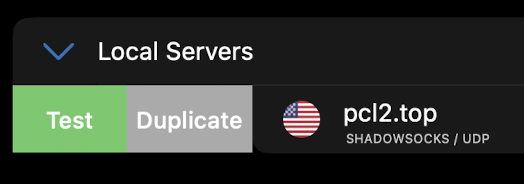
    Your VPN should appear on the main menu. Swipe from left to right and click on “Test” button and see if the server is connectable.

    Normally it would show the ms value. If it show up “Timeout”, check your configuration or restart.

    Click on your server, and set the “global routing” to “proxy”.

    Visit ipconfig.me website or any of the website which could show your IP address.

    Check if the IP address is as same as your VPS address.

    The End

    Written by Evandrel